wtfplay-live quick start guide
(for the impatient)
version 0.1, Feb 2016
1. A very quick word of introduction
This tutorial shows how to play music quickly with wtfplay-live, with emphasis on the word quickly.
There is not much reading here and there are few pictures for reference.
This tutorial covers following steps:
-
booting
-
detecting sound cards
-
detecting local disks
-
starting UI
It is assumed that you have burned wtfplay-live ISO image onto a CD/DVD or have written it on USB memory stick and you are going to use a PC with a sound interface connected to it.
You will also need a disk or memory stick or SD card with WAV or FLAC files connected your PC.
2. Booting
Boot the wtfplay-live disk. The first thing that you are going to see on the screen is the bootloader offering various Linux kernels to boot.
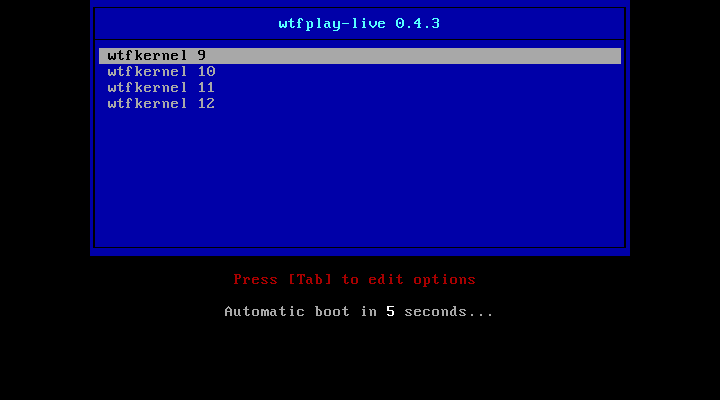
Accept the default choice choice by pressing ENTER or simply wait 5 seconds - the default kernel will boot automatically.
3. Detecting sound devices
After wtfplay-live is booted you will see the welcome note with some essential information and the Linux command prompt at the bottom. At this stage, we want to see what audio devices are available. In order to do this type following command and press ENTER:
snd_scanAfter successful execution you should see on the screen a table with audio
devices and their identifiers (hw:0, hw:1, etc…)
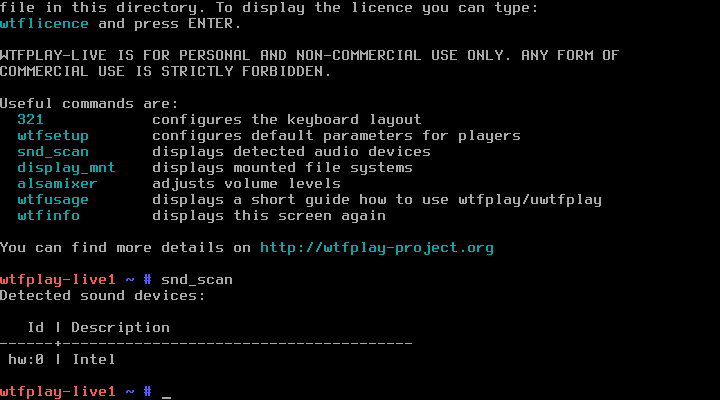
Remember the identifier of the device that you want to use. It is going to be needed very soon.
4. Checking what storage is available
Now you need a hard disk or USB memory stick with FLAC/WAV files to play. If the drive is not connected to your PC, please connect it now. And you may remove the wtfplay-live boot disk. It is no longer needed.
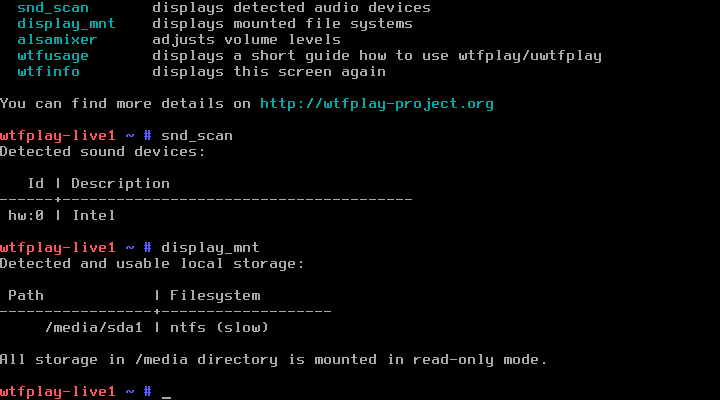
Check what disks are available by running display_mnt command:
display_mntThe command will display a table with all mounted file systems. You should see on the screen something similar to this:
5. Starting UI: wtfcui
Instead of running wtfplay from the command line you can run it via UI called wtfcui. That is an easier and quicker way to get started than using command line.
You will need the audio device identifier from the previous step.
wtfcui should be started with parameter -d DEV, where DEV should be
substituted by your audio device identifier. Here are examples how this should
be entered:
If the audio device identifier that you want to use is hw:0 type:
wtfcui -d hw:0If the audio device identifier that you want to use is hw:1 type:
wtfcui -d hw:1And similarly for other audio device identifiers in your system. After you type the command hit ENTER key to run wtfcui.
Directly after start, wtfcui displays a help screen. Please read it carefully as it provides essential usage information. You can close the help screen by pressing any key. Next, you will see the main user interface similar to the one below:
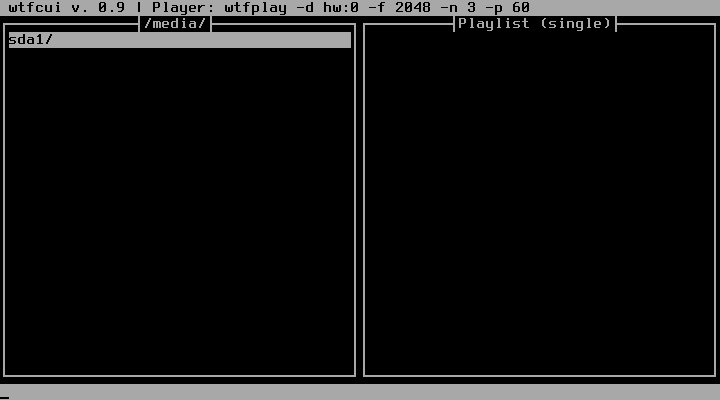
The left column is the file browser, the right column is the playlist. You can switch between then with the TAB key.
Navigate through the menu in the file browser with arrow keys, ENTER and BACKSPACE to find WAV or FLAC files that you want to play. Once you highlight the file you want to play, add it to the playlist by pressing A. You can add more files if you want.
Now switch to the playlist on the right by hitting TAB, highlight the file that you want to play (arrow keys again) and press ENTER. This should start the playback and you should hear the music coming from your speakers or headphones.
If your music plays, then congratulations! You have successfully completed this tutorial.
6. Troubles
If the file does not play or something does not work please refer to the full manual, that you can find here. It provides complete information about wtfplay.